VS Code
Introduction
So you’d like to use Visual Studio Code, but you need access to MLeRP too - maybe your data is on the cluster, or you want to run code interactively on a GPU, or you just really love VS Code.
No problem. You want a VS Code remote server.
Please DO NOT follow the official VS Code documentation for remote servers.
By default, if you follow those instructions, you will end up running the VS Code remote server on the login node. Even if you’re just managing your files, but especially if you’re running a notebook or running scripts we’ll need to allocate a resource just for you.
This proxy command which will forward your connection to our compute nodes rather than the login node. This will connect to a Terminal job, or if one doesn’t exist, it will make one for you.
# Linux and Mac
ProxyCommand="ssh <username>@monash-mlerp-login0.mlerp.cloud.edu.au /apps/strudel2/strudel_apps/sshnc.sh"

# Windows
ProxyCommand="ssh.exe <username>@monash-mlerp-login0.mlerp.cloud.edu.au /apps/strudel2/strudel_apps/sshnc.sh"
Note that you will need to authenticate with your ssh key/cert. You can then add it to your agent or provide it to the ssh command (and proxy command) with the -i flag.
If you’re not sure how to use a proxy command, read on and we’ll walk you through the steps.
Initial set-up instructions
1. Prepare VS Code
- Install Visual Studio Code
- Install the Remote Development Extension Pack
- Open
SettingswithCtrl+,and search forRemote.SSH: Remote Server Listen On Socket. Select the checkbox.
2. Generate an ssh key and certificate
- Generate your credentials SSH credentials through Strudel2 or through SSOSSH
- If you’re working in Windows, ensure OpenSSH is installed and enabled
- Optionally add the key to your ssh agent. Skip this step if you want to keep things simple.
3. Configure VS Code
Follow the instructions on our ssh page to configure your SSH Config. Note that your config will be different if you’re using keys added to the SSH agent.
Test our configurations with:
ssh <User>_MLeRP_Monash # Use this only for testing as it will connect direct to the login node
ssh <User>_MLeRP_Monash_job # This is the one that we will use to connect to your allocated job
The first configuration will connect directly to the login node, perfect for testing the connection. The second configuration will use the ProxyCommand to connect to a Jupyter Lab or Terminal job that you start from the Strudel2 login portal. If a job does not exist yet, it will create a small Panther QoS resource for you.
Using your VS Code remote server
1. Start a job for the remote server
Using Strudel2 in your web browser, login and select Terminal. Choose the resources you will need, including QoS, number of CPUs, amount of RAM and time. Click Launch and wait for the job to begin running under Pending/Running.
If you skip this step, we will create a default Panther QoS job for you.
2. Start the remote server
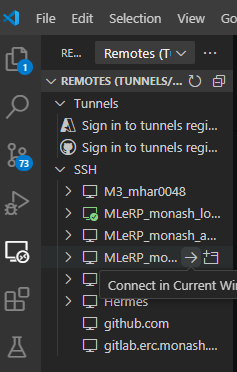
Your SSH configurations should be visible from the Remote Explorer tab in the side bar. You can now connect to the cluster by selecting the appropriate SSH configuration from the menu. Hovering over an entry will reveal options to connect in the current window or connect in a new window.
You will be prompted to provide the OS of the server, select Linux. If you are using a password on your SSH key, VS Code will ask twice (once to the connect to the login nodes, then again to connect to the node running the remote server).
You should now have an active connection to the cluster.
3. Using the remote server
Using File > Open File or File > Open Folder will open files and projects on the cluster.
There are some extensions which will carry over to your remote server, but others, such as the Jupyter extension, will need to be installed to the remote server. You can do so from the extensions menu in the side bar just as normal.
4. Adding your python interpreters
A VS Code remote session will not pick up any of our provided environments automatically - even when attaching to a job that activates the environment. To use an environment other that system python you will need to add it as a python interpreter.
- Open the command pallet with
View > Command Pallete - Select
Python: Select Interpreter - Select
Enter interpreter pathand fill in the prompt
This environment will now be visible to the python debugger and Jupyter extension.
If you’d like to use one of our environments, you can find the path to their interpreter on its environment page. A full list of our environments can be found here. If you’d like to use an environment that you maintain yourself through conda or mamba, the interpreter is found at:
# Base
/path/to/conda/bin/python3

# Virtual Environment
/path/to/conda/envs/<environment_name>/bin/python3
FAQ
I see a message about “Connection Reset by peer”.
This will happen if you fail to authenticate too many times - perhaps typing in your key passphrase incorrectly. Wait 10 minutes, and try again. If you still run into errors please contact the helpdesk at mlerphelp@monash.edu.
I keep getting prompted for a password even though I’m using a key.
Check that your connection command includes the username everwhere you need it (it should be in there twice, once for the login node and once for the compute node). Also, ensure you added your keys to the ssh-agent to avoid typing your key passphrase every time. You will need to do this after every reboot.
I got an error message about posix spawn.
You’re probably on Windows. Check that you used the Windows specific command line with ssh.exe instead of ssh.
I tried to use the ssh-agent but it says “Permissions mykey are too open.
Private keys should never be shared - ensure only you have read, write, and execute permissions on your private key. Linux/Mac user see this StackOverflow post. Windows Users, see this blog post